From World Wind Wiki
This page will give a brief introduction to World Wind 1.4, and explain how to activate the most popular and useful new features. For a more comprehensive list see World Wind New Features 1 3 6-1 4.
A video showing some of these new features can be found on YouTube
[edit] Plug-ins and Add-ons
Many plug-ins have been upgraded to work with NASA World Wind 1.4, you can find a full list at the 1.4 plug-ins page. Please note many plug-ins that were designed for earlier versions of World Wind will likely not work and may cause graphical anomalies or crashes.
All Add-ons for NASA World Wind 1.3.5 will still work in 1.4, for more information on what add-ons and plug-ins are see the Add-on Launchpad.
[edit] Sun shading and Atmospheric Scattering
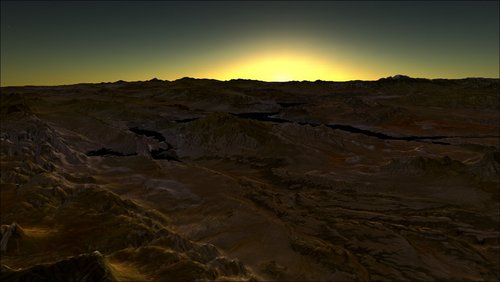
figure 1 – Sun shading + Atmospheric scattering
These features require a modern PC with a good 3D graphics card, as a general rule if your computer cannot run the latest 3D games such as Oblivion or Half life 2 then it probably won’t be able to handle these features.
[edit] Enabling Sun shading
Sun Shading applies a realistic lighting effect to the imagery shown in World Wind.
- To enable Sun Shading either navigate to the ‘View’ menu and click ‘Sun Shading’ (see figure 2) or press Shift+S.
[edit] Enabling Atmospheric Scattering
Atmospheric Scattering gives World Wind an Atmosphere, and gives realistic sunsets and sunrises.
- To enable Atmospheric Scattering either navigate to the ‘View’ menu and click ‘Atmospheric Scattering’ (see figure 3) or press Shift+A.
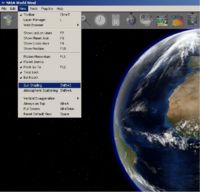 figure 2 – Enabling Sun shading | 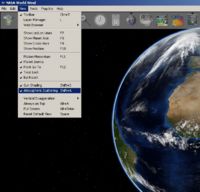 figure 3 – Enabling Atmospheric Scattering |
[edit] Advanced options
[edit] CPU/GPU rendering
This lets you select either CPU or GPU (Graphics card) rendering for Atmospheric Scattering. CPU rendering is more accurate but needs a more powerful CPU and can slow your system down considerably, GPU rendering is faster but requires a modern graphics card with Pixel Shader 2.0 support.
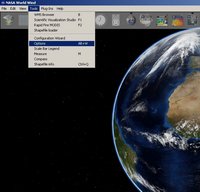
- To enable GPU rendering navigate to the ‘Tools’ menu and click ‘Options’ (see figure 4), then navigate to the ‘Atmosphere’ section, and from the drop down menu next to ‘ForceCpuAtmosphere’ select ‘False’ (see figure 5), you can then close the options dialog box.
|
| 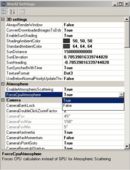 figure 5 – ForceCpuAtmosphere |
[edit] Sun Light Control
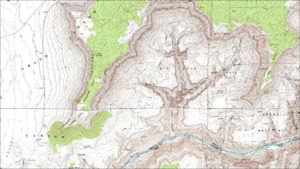 figure 6 – No Sun shading | 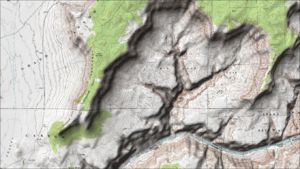 figure 7 – Fixed Sun shading |
This Dialog box lets you manually alter the Sun’s position, by default the Sun’s position is calculated accurately based on your system clock. The manual placement option is especially useful for creating shaded relief maps from layers like the USGS topographic and Virtual Earth road maps.
- To open the dialog box navigate to the ‘Tools’ menu and click ‘Sunlight control…’ (see figure 8), the dialog box will then open (see figure 9), moving the sliders allows manual positioning of the Sun.
|
| 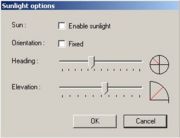 figure 9 – Sunlight options | 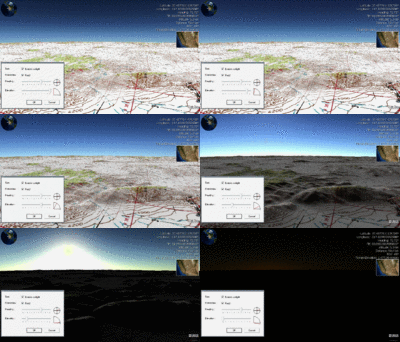 figure 10 – Sunlight animation |
[edit] Time Controller
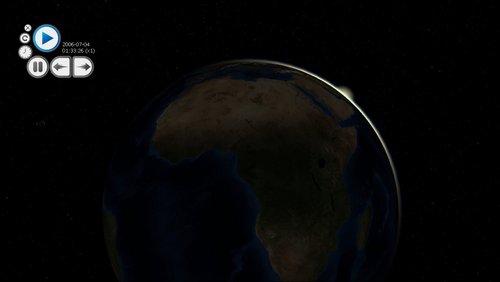
figure 15 – Time Controller Sunrise
The Time Controller accurately sets the Sun’s position when using Sun Shading, by default this is set to your current system clock (so if it is dark outside the World Wind globe may also appear dark), using the Time Controller you can speed up or even reverse the Sun’s movement.
[edit] Using the Time Controller
- To open the Time Controller widget click the clock icon in World Wind’s toolbar (see figure 16).
- The Time Controller widget (see figure 17) has several buttons to control the Sun. The ‘Play’ button starts the Sun moving, the ‘Pause’ button freezes the Sun’s position, the two arrows control the direction of time, repeated pressing of either button will increase or decrease the Sun’s rotation speed, the ‘C’ button resets the Time Controller to it’s default speed and time, the ‘x’ button closes the widget, and the ‘Clock’ button opens a form (see figure 18) which lets you set the Sun’s position to a specific time and date.
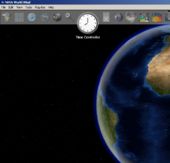 figure 16 – The Time Controller toolbar icon | 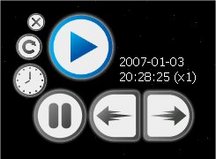 figure 17 – Time Controller widget | 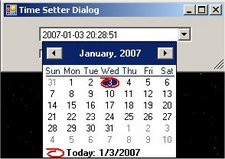 figure 18 – Time Setting form |
- The Time Controller widget also displays useful information, the first is the date that World Wind is currently set to, below this is the time World Wind is currently set to, in brackets next to the time is the current zoom or speed, x1 means the Sun moves at the actual speed it would move in real life, x100 means it is moving at 100 times real speed, -100 means it is moving backwards at 100 times real speed.
[edit] WMS Importer
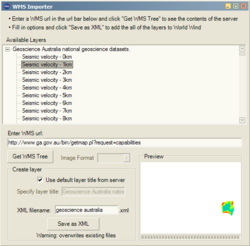
figure 19 – WMS Importer GUI
A web map server (WMS) is a type of web server that allows you to requests images of maps of a specified area. WW allows you to view imagery layers from these servers.
[edit] Using WMS Importer
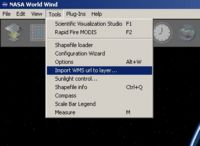
figure 20 – WMS Importer Tool menu item
To begin, follow these steps:
- Launch the WMS Importer from the “Tools” menu (see figure 20).
- Find the url for the server you want to view. By default the importer will include the url of a server run by Geoscience Australia that contains maps illustrating a great deal of geological information about Australia.
- Paste the URL into the URL bar near the center of the screen and click the “Get WMS tree” button. This will contact the server and download a list of all the layers it has available. This list will appear as in a tree layout in the main panel of the window. Selecting one of the layers will show a small preview of the layer in the lower right panel (if a preview is available from the server).
- To add the contents of the server as an ordinary World Wind layer, fill enter an xml file name and a layer title (if desired) and click the “Save as XML” button. This will save a WW xml file in your \Config\Earth directory and will add the layer to the layer manager. From there you can browser the maps in World Wind like any other layer
- This layer is permanently added to World Wind. To remove it, right-click on the main layer title and select “Delete”, or delete the xml file and restart World Wind.
[edit] Issues
These map servers are run by government agencies and private companies or organizations who have nothing to do with NASA, World Wind, or the World Wind open source community. We can not be responsible for the content, status, or availability of a server at any particular time. Additionally, every server is configured differently and thus may not support all of the features that World Wind needs. If tiles for a layer aren’t appearing in World Wind then check the download monitor window (ctrl+h) for any error messages. Occasionally these messages may be resolved by making adjustments to the layer setup parameters in the xml file, but often the only way to fix them is to get the administrator of the server to correct the configuration.
[edit] Anaglyph 3D mode
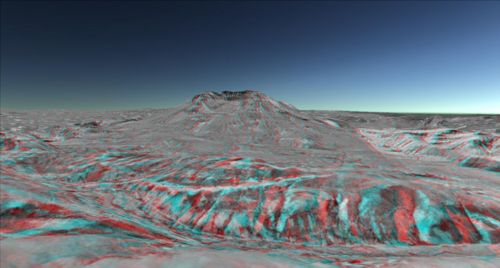
figure 21 – Anaglyph 3D view of Mount St.Helens
figure 22 – Enabling Anaglyph 3D mode
This feature may not work on older graphics cards. You may experience headaches and/or dizziness if using this feature for prolonged periods, please ensure you take regular breaks.
[edit] Enabling Anaglyph 3D mode
This feature allows you to use anaglyph (Red/Blue) glasses, often given away free with magazines, to view World Wind in TRUE 3D.
- To turn on Anaglyph 3D mode, tick ‘Anaglyph 3D View Mode’ under World Wind’s View menu (see figure 22), to turn it back off simply return to the View menu and un-tick ‘Anaglyph 3D View Mode’.